What happens to the body when you have not had an intimate relationship for a long time?
And physical contact, and growing up we also seek communication, hugs and love. Proximity has a positive effect on ...
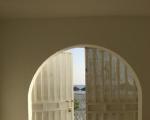
Home photo gallery is original idea, which you can implement with your own hands. You just need to have the right idea of \u200b\u200bhow best to arrange photo frames in the interior. Basically, people prefer to create something like a family tree from photographs. Photos are a part of our life, reminding us of the moments we spent with loved ones.
Each of us takes pictures, but only a few print them out to keep them as a keepsake.

Take your precious photos and memories out of albums and hang them on the walls so you can enjoy them every day. Your collection of photographs will remind you of past events, become an important decor element, and also your favorite place in the house.

Center three large photo frames of the same size to create a focal point. And hang smaller frames around the center frames to create a gallery effect. Make sure all elements are aligned and form a geometric shape.

Over the stairs
It is best to place photo frames above the stairs with “steps”. First, hang the large photo frames - the main elements, and then arrange the smaller frames.

On shelves
Arrange photo frames of several sizes on hanging shelves so that some of them slightly overlap each other
- Photo galleries above the stairs are the best idea as going up or down, you can admire the pictures every time
- Photo gallery can be placed above the sofa in the living room. But only a photo composition should hang on the wall and nothing else.
- The combination of large and small photo frames looks especially good. When we look at photographs, we savor and cherish the memories captured in the photograph. 
Another great idea for your own photo gallery is to place photo frames on a colored wall, so your composition will look even more original and beautiful. You can also create collages and place them in one large frame. There are many ideas for decorating a home photo gallery, take a look at these examples.


People today have more photographs at their disposal than at any other time in history. So why not decorate your home with them? Family or other close to heart photos on the wall will make the interior of your home more lively, cozy and memorable. But for this you need to familiarize yourself with the secrets of creating stylish compositions. In this article, you will learn how to beautifully hang photos on the wall, and see the best examples of gallery design in photo rooms.
At first glance, it may seem that for a beautiful room decoration with photographs, it is enough to buy a collage or the required number of frames, and that's it. However, a poorly thought out scheme will not only not bring you joy, but can even turn into a constant source of annoyance. With a little more effort, you can make the pictures on the wall look like a true work of art.
The basic steps for this are as follows:
Also read:
2. Determine the boundaries in which the collage or collection of photo frames will be placed. The area of \u200b\u200bthis area should be in harmony with individual interior details. For example, it can match the size of a window, the width of a sofa, or a carpet on the living room floor.

3. Choose a frame design and type of circuit: will it be symmetrical or asymmetrical? In both cases, the size and shape of the frames does not matter - you can play with them as much as you like. At the same time, in a strictly symmetrical scheme, it is recommended to compare frames of the same color and design, and an asymmetric one - to balance in visual mass and shades relative to the center.


4. Draw up a scheme for hanging photo frames on the wall. We will dwell on this point in more detail.
To hang your photos on the wall beautifully the first time, use a simple trick. Spread a large sheet of paper on the floor (or tape several sheets of paper together). Lay out the photo frames on this sheet, moving them until you are completely satisfied with the composition. Trace the contours of the frames with a pencil, then use buttons or needles to attach the sheet to the wall to finally be sure of the result. If you do not need to make any changes, mark the placement of the photos with nails and remove the sheet.

For greater clarity, you can even cut out the outlines of the frames from paper, as shown in the photo below.

You will find several ready-made useful schemes for creating a photo gallery on the wall in our article:.
Whatever scheme you choose to hang photos on the wall, try to combine all its parts into a single whole using a common element. This can be the color of the photos, the material of the frame, or the size of the image. For example, photos of different sizes will look great together if they are all in black and white.


 Also read:

If you want to go the difficult, but also more interesting way, and combine completely different frames and photographs, then remember the need to visually balance the composition in the center and that the frames should be located at approximately the same distance from each other.


Would you like to learn how to beautifully hang pictures on the wall without frames? Or how to decorate a wall with lots of photos without having to drill a lot of holes? Read about the most creative ways to design a home photo gallery in the final part of this article.


3. Place photo frames on both sides of the corner at the junction of the walls

4. Fix photos on a special backing


7. Use clothespins and other materials at hand


Which method did you like the most? Let us know in the comments!
How to arrange photos on the wall - 30 photos in the interior
updated: October 20, 2016 by the author: Margarita GlushkoUseful Tips
Photos can beautify any home, be it family, work or hobby photography.
But in reality, decorating a wall with photographs can be a painful work.
This does not mean that you have to give up everything. You just need to learn about a few tricks that will help you hang any photos neatly and evenly on the wall.
On our website you will also find:

If you have a smartphone or tablet, download the "Building level" or "Bubble level" application for your Android device or, for example, "iHandy Level" for the iPhone.
This bubble level uses an accelerometer and gyroscope to help you: measure and calculate angle, measure water level, measure balance and tilt. Such a tool is also called a laser level, plumb line, protractor or tilt indicator.

Use a large piece of wallpaper or a roll of brown paper to hang several photos or paintings evenly.
You will need:
Wrapping
Photos or paintings
Pencil
Duct tape
Nails and hammer or other tools for attaching photos to the wall.
1. Place the paper on a flat surface and place the frames with the photos you want to hang on top of it. Use a drawing on paper so that the space between the frames is the same.

2. Trace the frames with a pencil.
3. Set the frames aside, hang the wrapping paper on the wall and temporarily secure it with duct tape.

4. Using the rectangles drawn on the paper, it will be easier for you to attach the photo frames to the wall using nails and a hammer or other tools.


Using plain paper or newspaper and masking tape, you can plan out all the places where your photos will be on the wall.
You will need:
Hammer
A roll of paper or many newspapers
Scissors
Level
Masking tape
Nails and hooks
Pencil
Photos.
* If you want to hang one or more large photographs, then try not to hang them in the center of the entire composition of photographs.

1. Spread paper or newspapers on the floor.
2. Lay out the photos on paper as you would like them to hang on the wall. It is advisable to keep a distance of 5-7 cm between photos.

3. Trace the frames on the paper and cut out the outlined shapes.
4. Glue the paper figures to the wall the way you would like the pictures to hang.
5. Nail in nails or hooks, peel off the paper and hang the photos.

You will need:
Double-sided tape
Masking tape
Level
Ruler
Pencil
Scissors.
1. Determine the center of your future composition and draw a straight line.

2. Starting from the drawn vertical line, cover with masking tape the places where the photographs will hang. The tape should match the size of the photo or poster.

3. Apply double-sided tape over the masking tape. You can glue photos to it.

Masking tape is needed so that you can take your photos at any time without ruining the wallpaper or peeling off the paint on the wall.

Masking tape can also be used to pinpoint the exact spot for nails or hooks.
1. Place the photo or poster frame face down and place masking tape (not the sticky side) at the hinges.

2. Mark the locations of the hinges on masking tape so you know where to nail the nails.
3. Now take this piece of masking tape and stick it evenly to the wall. Use a level to ensure that the tape adheres smoothly.

* The building level can be downloaded to a smartphone or tablet: "Bubble level" for an Android device or, for example, "iHandy Level" for an iPhone.
4. Drive nails in the areas marked on the tape and remove the tape from the wall.


You will need:
Wrapping paper or newspaper
Masking tape
Pencil
Scissors.
1. Place your photo frames on paper or newspaper and circle each frame. Cut out the resulting rectangles.
2. On the wall, mark the same distance from each ladder.

3. Glue masking tape to the wall (it comes off easily and without problems) - thereby you mark the place where the frames will hang.
4. Using a level, start gluing evenly paper rectanglesto the wall (using masking tape). You can start with two rectangles glued to opposite ends of the masking tape.

5. Now glue the rectangle for one of the frames in the middle of the tape on the wall.

6. Start adding rectangles for the frames.

7. Drive nails into the wall through the paper rectangles (after measuring the distance from the edges so that the nail in each frame is exactly in the middle).
8. Remove the tape from the paper and hang the photo frames.

Stick the masking tape straight to the wall.

With the help of double-sided tape, you can glue any photos and pictures exactly in relation to the tape glued to the wall.

When you have attached all the photos, remove the masking tape.

Washi tape - Japanese duct tape; she is Washi Tape.

You will need:
Washi tape
Double-sided tape
Scissors or utility knife
Level.

1. Use a level to evenly tape the photo to the wall with double-sided tape.
2. Use the washi tape to create a frame around the photo. Just stick the washi tape evenly around the image. You can create different patterns with this bright ribbon.

* Use scissors or a utility knife to carefully cut off the washi tape to create even frames.

You will need:
Drawing of your construction
Strong thread
Photos

1. Draw on paper a rough design from the thread that you are going to weave on the wall. You can draw arrows that will tell you where to turn the thread while weaving.

2. Using the instructions, nail the nails to the wall and start weaving the thread around the nails to create the desired design.


You will need:
Small branch
Photos
Hooks, nails, or strong double tape (optional).
1. Stick a branch to the wall or place it in a vase.

2. Make small holes in some photographs and tie a thread to the images.
3.Use a string to tie the photos to the branch.
Photos collected in the sun

You will need:
Scissors
Stationery knife
Clothespins
Powerful double-sided tape
Super glue or hot glue
Paints (optional).
1. Cut a circle out of cardboard.

2. Using a utility knife, cut out a circle within a circle.
* If you wish, you can paint the cardboard circle with acrylic paints.
3. Glue clothespins to the circle as shown in the image.

4. The circle can be attached to the wall with strong double-sided tape.
5. Attach photos to the clothespins.
Good afternoon friends!
Bare empty walls in rooms sometimes bring boredom, so quite often we decorate them with paintings, panels, and hang shelves. Decorating the wall with photographs has become popular again, as in the old days. And in order for a gallery of photos to look stylish and beautiful, you need to know just a few rules of how to place photos on the wall in the room, whether they are photos with or without frames. This is what today's topic will be devoted to.
On the wall in our gallery we would like to see different in shape, size, color, style, genre of photography. With all this, they need to somehow be harmoniously combined into one whole to get a stylish composition. How beautifully to place photos and how to do it correctly, we will figure it out.
I remember from my childhood the pleasure with which I looked at family photographs on the wall of my grandmother's room. There were no albums then and all the photos of different generations were hung over the sofas, and my grandmother always told some story from them.
I think that now there is no such need to turn a room into a photo studio and hang everything in a row. We will choose the best photos that we would like to always see before our eyes.
For the bedroom, wedding photos or taken during the honeymoon are suitable.
In the nursery, as a rule, photographs of children are posted.
In the living room - general photos against the background of nature, in the kitchen - pictures with images of their pets - cats and dogs.
The number of photos can vary from one bright large photo to several, and it is possible to use photos of the same or different sizes.
Photos within the same size always look advantageous, they are perfectly placed on the wall both in width and height, creating strict geometric shapes such as a square or rectangle, as well as others, for example, in the shape of a heart.
It is preferable to post pictures on the wall in frames. Small photos can first be issued in the passport, and then they can be framed.
Here you need to observe a single style: it is desirable that the frames are painted in the same color, regardless of their size, thickness and material from which they are made. It is interesting to make frames for photos with your own hands. We have several. Only for the most part, such self-made frames are suitable for decorating one or two photos, and not an entire gallery.
Color photographs look harmoniously in black or white frames.
Black and white photos are good with gilded frames.
In a room with bright accessories, place photos in silver frames, and in bright rooms, strict black frames will act as a bright accent.
While preparing the material, I met an excellent video of an interior designer and everything became very clear. Knowing the basic compositional principles of placing photographs on the wall, you can very beautifully and at the same time decorate the wall in the room with photographs in an original way.
There are only two principles of placement:
The principle of symmetry is a simple and safe way to position photos on the wall.
Whatever the size of the photo you choose, you need to place them on the wall, observing symmetry. For example, place one large photo in the center, and small ones to the left and right of it. Or place four small photos under two large ones.
See the diagrams for a few examples. If you mentally draw a vertical line in the center (the axis of symmetry), then it is obvious that all the images are symmetrically located to the left and right of it.

The plot in the photographs can be different, but the shape and size of those placed on both sides of the axis of symmetry are fundamental.
Moreover, another object can be placed in the center: a picture or a mirror.
If everything is clear and simple with the location of photos above the sofa, then when placing photos above the table, you need to take into account what else may be on it. All items placed on it should become a single whole in the composition with photographs.
The second principle "Equilibrium" is clearly shown in the following diagrams.

Again, mentally draw a line in the center and see that the objects on both sides are not symmetrical, but the large photo on the left (in the first diagram) is balanced by four small photos on the right.
This is also clearly seen in other examples.
Any object hanging on the wall or standing next to a table or shelf (mirror, candlestick, vase, clock, floor lamp) can act as a balance, which makes the composition even more interesting.
Most often, photographs are hung over a sofa or bed, over a table, just on a free wall.
As well as for, when placing photos on the wall, the rule of their location at eye level applies, because if it is higher, then it will simply not be convenient to look at them.
Sometimes photos are placed so that their bottom edge is on the same line, or photos are placed up and down symmetrically relative to the horizontal line.
There is a classic arrangement of photographs of 10 pieces, arranged so that they form a rectangle.
In the following diagram, you can see that this is a large photo to the right, to the left of it there are two rows of smaller photos, unfolded horizontally and vertically, one square photo.

Below this composition is a row of square photos and a photograph stretched horizontally.
Now we take all the selected pictures and lay them out on the floor, experimenting. Rotate our composition 90 degrees, maybe 180 or 270?
Add 10 more photos to these photos, placing them symmetrically relative to the existing ones vertically or horizontally.

You can try to shift the location of a part of the composition down, for example, this option is just right when the photo is located above the stairs.
In general, experiment.
Let me remind you the basic rules for posting photos:
These simple tips will help you beautifully place photos on the wall in the room.
If you do not have frames for photos, or there are so many photos that it is impossible to frame everything, but if you just want to place photos creatively, I suggest the following idea.
We find on a walk in the park or in the country an ordinary twig, it will go as a crossbar on which we will hang a photo.
We'll need more rope and tape.
With the help of scotch tape we attach the photos to the strings and hang them on the crossbar.
Photo collages are a fun way to decorate a large wall space. To make a collage, you need to choose several photos in the same or different styles, the same or different sizes and place them on the wall. Everything sounds simple enough, however, more often than not, attempts to make a collage of photos on the wall turns this very wall into chaos and makes it look not beautiful and interesting, but chaotic and tasteless.
There are several rules on how to place photos on the wall so that the whole composition looks original and dignified.
The first step to successful photo placement is choosing a wall. It is better to place photographs on the wall, which can be looked at from afar and thus appreciate the entire integrity of the composition, and to which you can come close to examine the photographs in more detail.
For this reason, I do not recommend posting photo collages in hallways or over closed staircases. It is advisable to place photos on the wall only when the distance to the opposite wall is at least 3.5 meters.

On average, you need 2 meters of free wall space to place a collage. This does not mean at all that your exposure should be so great, just if this rule is observed, the composition of photographs on the wall will look free, and not squished and crumpled.

Designers do not recommend posting personal photos, that is, images of family members over large pieces of furniture - a bed or a sofa, because your guests will want to take a closer look at the photo. The only designer-verified option for placing personal photographs over the head of the bed is to use several large photographs with a small amount of detail, black and white is also possible.

Now that you've chosen which wall to place your photos on, it's time to plan your collage ...
Most often, family photos, or thematic cycles of photographs by modern photographers, are chosen for the device. A little less often - photo reproductions of famous paintings or images of nature. All of these options are good, if you have not opted for family photos - start from the style of the room.

Remember, in any successful collage, in addition to semantic unity, there should be a certain visual center - the largest or brightest frame. A photo collage looks very nice, where one or several images are replaced by mirrors.
Now you need to decide - are you going to use frames for photos and if so, which ones. If you have chosen the option with frames, then it is absolutely not necessary to buy the same ones. There is a rule: the more similar your chosen images are, the more freedom you can allow yourself when choosing frames. Just don't overdo it!

If you feel that the frames you have selected are unique in themselves, then you can do without frames at all.

If you are grouping different types of elements - photos of different style or photos and mirrors, then the choice of frames should be very conservative: it is better to be thin white, black or silver (if there is a mirror in the composition) frames.
Today everything is very simple. There are many ready-made solutions that you can try. To determine the place and size, you can cut out sheets of cardboard or colored paper and place them on the wall as you plan to place the photos.


If you do not like any of the ready-made options for placing photos on the wall, you can come up with your own, following the rules:

Now you know, how to beautifully place photos on the walls.

And physical contact, and growing up we also seek communication, hugs and love. Proximity has a positive effect on ...

Before communion, you must pass the Sacrament of Confession. In the Cathedral of St. John the Baptist, confession begins ...

Sometimes a relationship develops between a man and a woman, which seems to be there, but it seems that there are almost none. They are...
Sometimes a relationship develops between a man and a woman, which seems to be there, but it seems that there are almost none. They are...

It is conventionally believed that all of us, having reached the age of 30, are already fully formed personalities, both physiologically, ...

Superstition and truth First of all, let's figure out why this age is called the age of Christ. About two thousand years ...

There are times when so many questions accumulate that you need to somehow give them a way out. Writer,...

The article gives advice on how to survive a divorce from a husband or wife, since parting with the other half is ...

I will never forget this day. It was March 7, I was returning from a business trip by bus, on the radio annoyingly ...

Alena Popova, consultant for mothers on family time management and organization of life with a child. Often...
Usually, with age, childhood memories are distorted: dates shift, some facts are erased, emotional ...

There are many interesting things in life besides sex, however, without it they are not interesting (V. Saltykov). …Not interested,...

Psychologist's answer: Daughter treats you functionally.A normal relationship means being attentive to ...

Usually, with age, childhood memories are distorted: dates shift, some facts are erased, emotional ...

Fornication is a concept that needs clarification. If you talk to believers, you will not hear any definitions! For...

If you put several people in one room waiting for an SMS or message on a social network, then quite ...